Demo Enrolment
The enrolment procedure entails 3 steps, as shown below.

The average time to complete this process is approximately 15 minutes.
Before starting the procedure, please remember to have the following scanned documents (.jpeg, .pdf or other formats) ready on your computer that will be required to be uploaded during the pre-enrolment process:
-
Valid identity document (ID Card or Passport)
-
Fiscal Code
-
Certificate of a study title (copy of diploma/degree or self-certification)
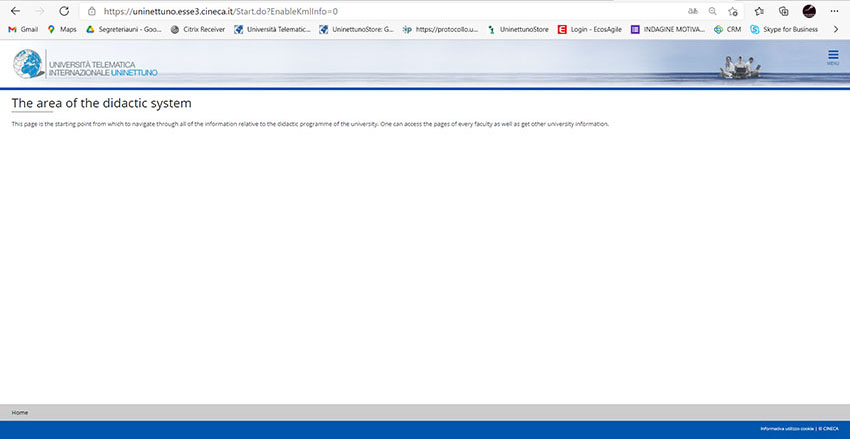
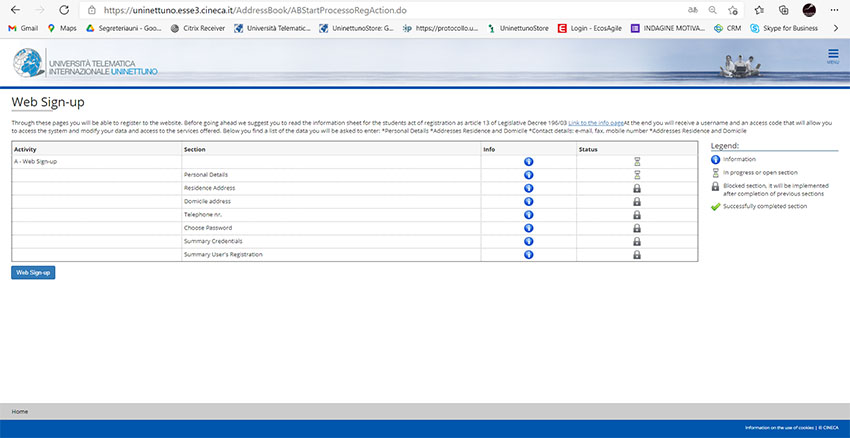
Step 1 – Registration
The student will have to access UNINETTUNO Administrative Secretariat
Click on "Registration" in the drop-down menu on the top right.
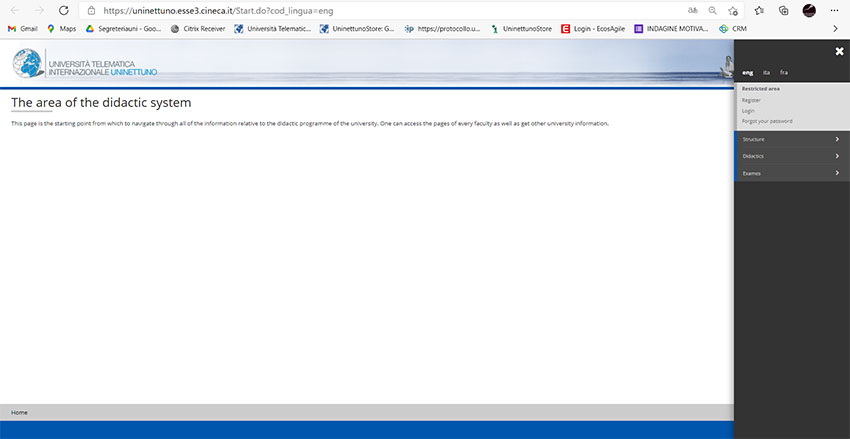
It is possible to display UNINETTUNO's privacy policy. To start the registration, click on the "Web Sign-up" button.
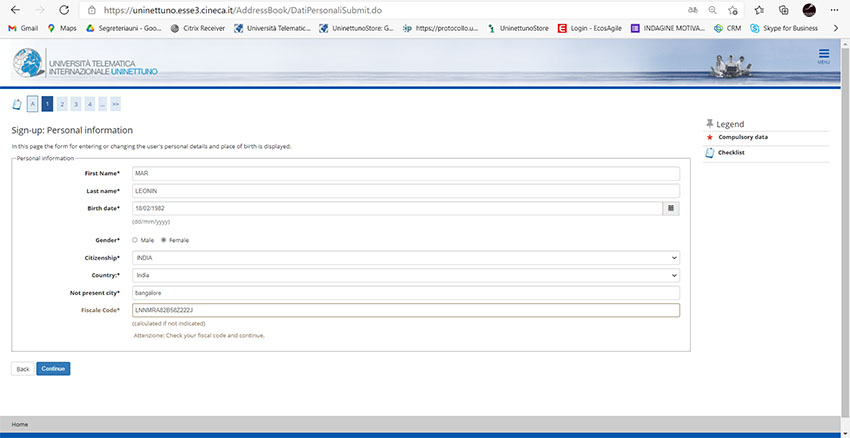
Step 1.1 – Personal Data
The first screen is for entering personal data.
All fields in this screen are mandatory.
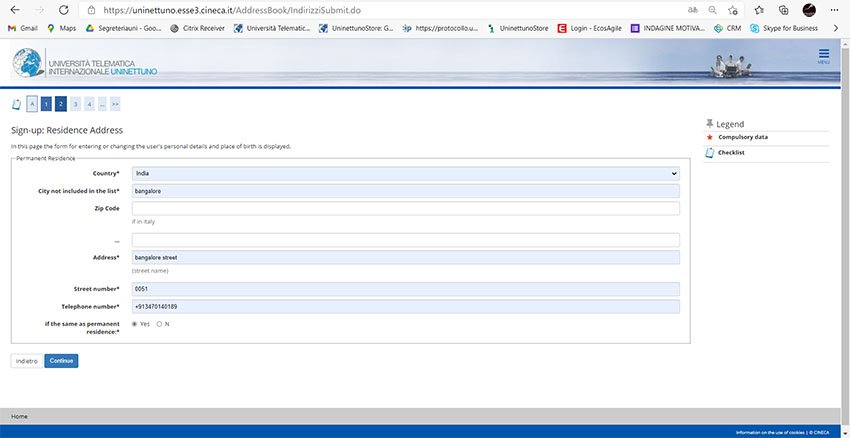
Step 1.2 – Residence
The second screen provides for the entering data related to the address of Residence of the student.
All fields marked with an asterisk are mandatory.
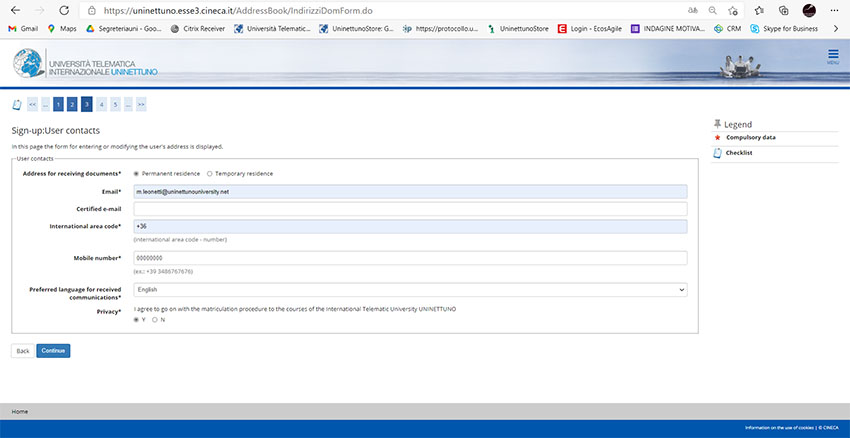
Step 1.3 – Recording Address and Confirming Privacy Statement
The third screen refers to the student's delivery address.
In the "Mobile Phone" field, enter the number without international prefix and without spaces between the numbers.
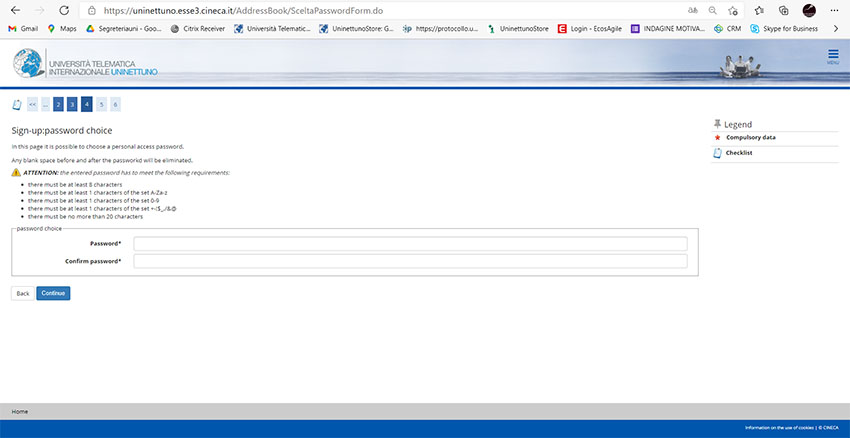
Step 1.4 – Password
The following screen allows choosing the password, according to the prescribed criteria, to access UNINETTUNO portal and complete the enrolment. It is advisable to always write down the chosen password; in the next steps there will be anyway the possibility to save a reminder.
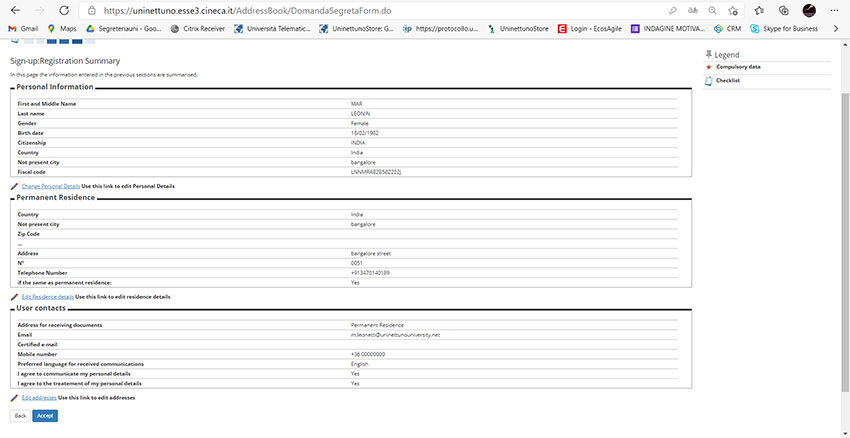
Step 1.5 – Summary
The summary, in the next screen, allows to check and eventually modify some data.
Step 1.6 – Registration Conclusion
The enrolment has ended and in this screen you can check the User Name - set automatically - and the Password that has been chosen.
The login credentials are also sent to the email previously indicated. For privacy reasons the password is not included in the confirmation email.
The "Print memo" function allows to save the credentials in a single file.
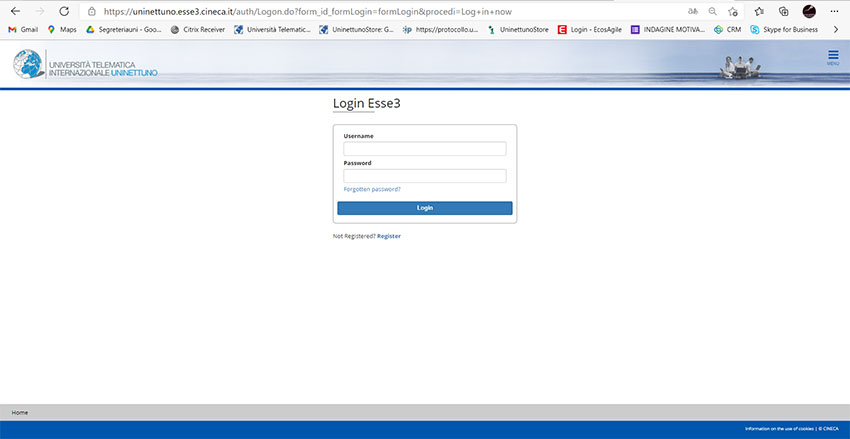
To move on to the Pre-Matriculation phase, click now on "Proceed with Authentication" and enter your credentials.

Step 2 – Pre-Enrolment
Enter your login credentials to continue with the procedure.

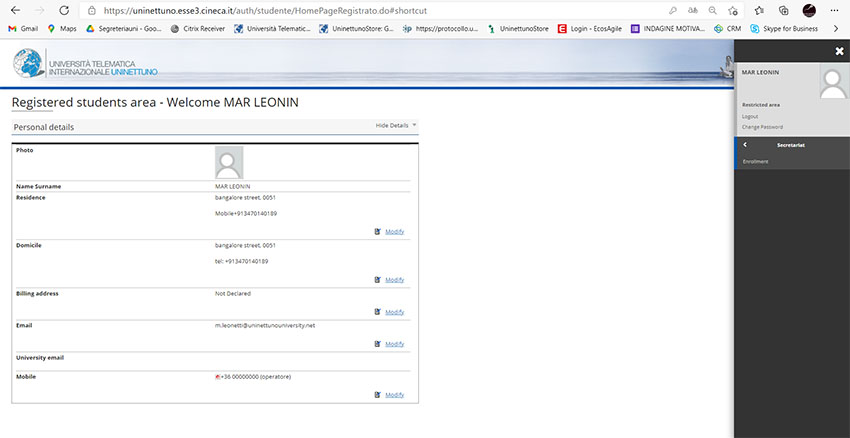
Once authenticated with their credentials, the student will need to click on the menu button at the top right of the screen, and then Secretariat -> Enrolment.
Step 2.1 – Course Type
In these next two screens you choose the course type and the specific course.

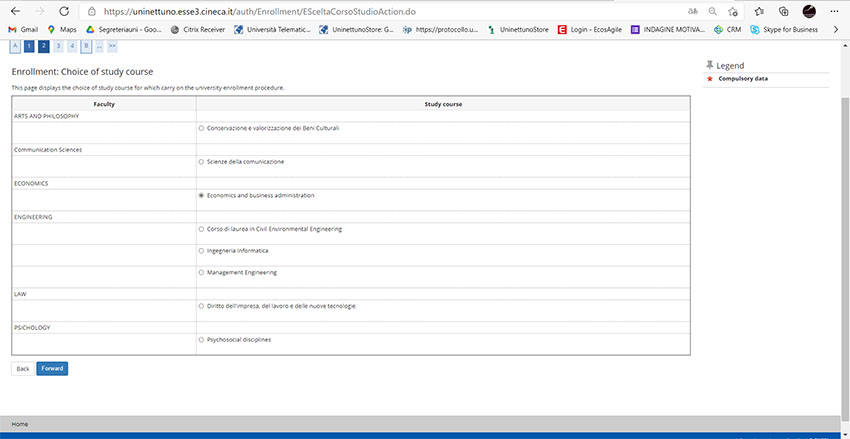
If the course you are interested in also includes pathways, you must select the study pathway on the next screen.

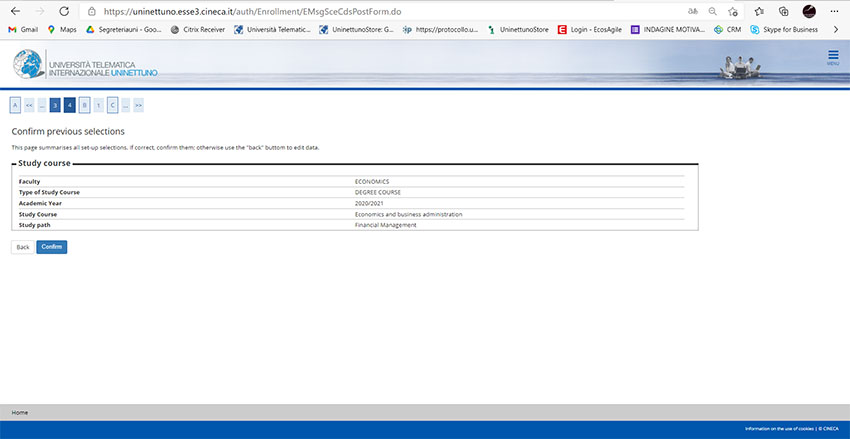
Step 2.2 – Confirm Choices
This screen is a summary of the choices made regarding the course of interest.
For eventual changes you can always click on the "Back" button.
Step 2.3 – Consent
Through this screen the student can read the UNINETTUNO "Contract with the Student".
Consent is compulsory in order to continue the pre-enrolment procedure.

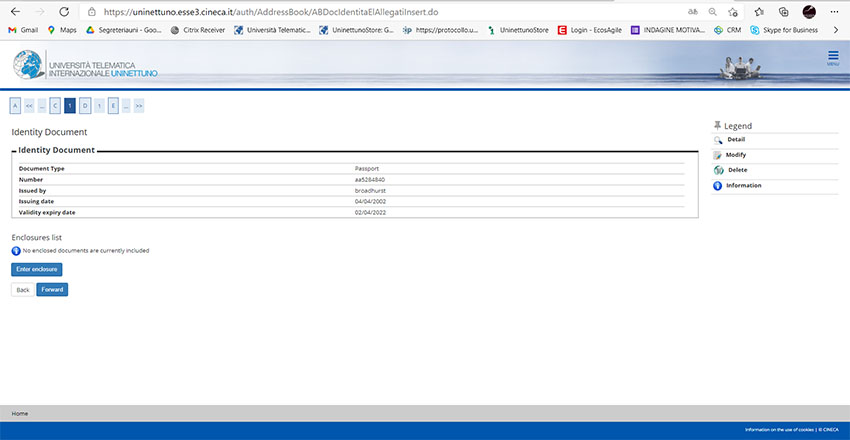
Step 2.4 – Identity Document
The student will now have to enter the data of the valid identity document.
It is possible to enter the details of your Identity Card or Passport.


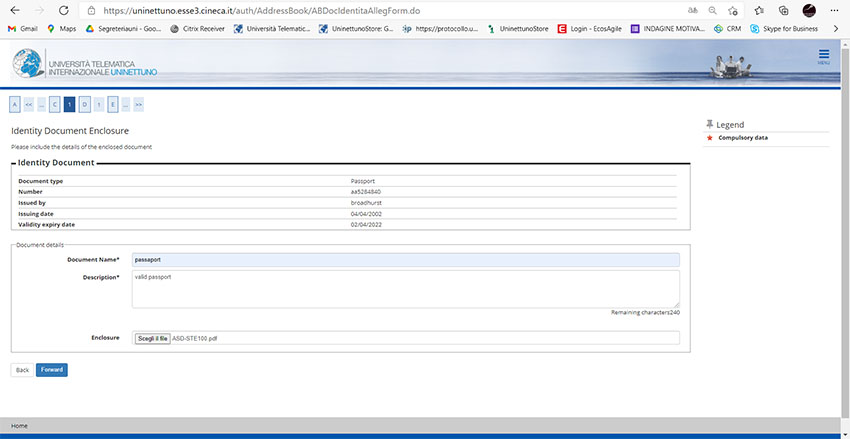
Step 2.5 - Loading Identity Document
This screen, linked to the previous one, allows you to enter the scan of the identity document in any format (.jpeg, .pdf or other).
The upload of the identity document is mandatory.
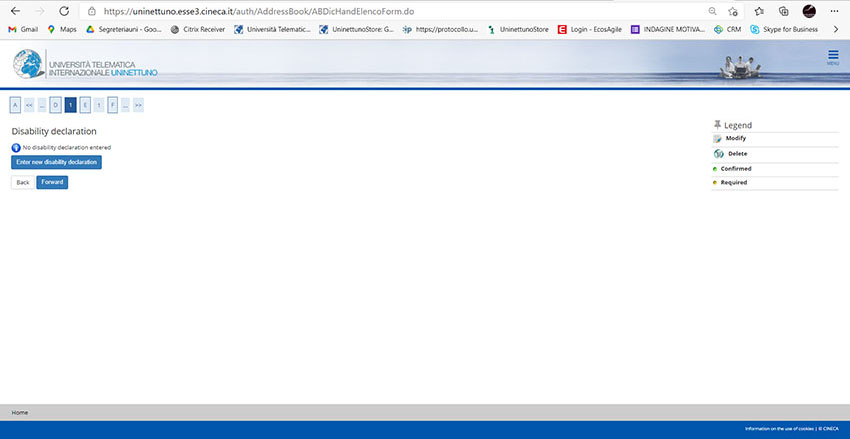
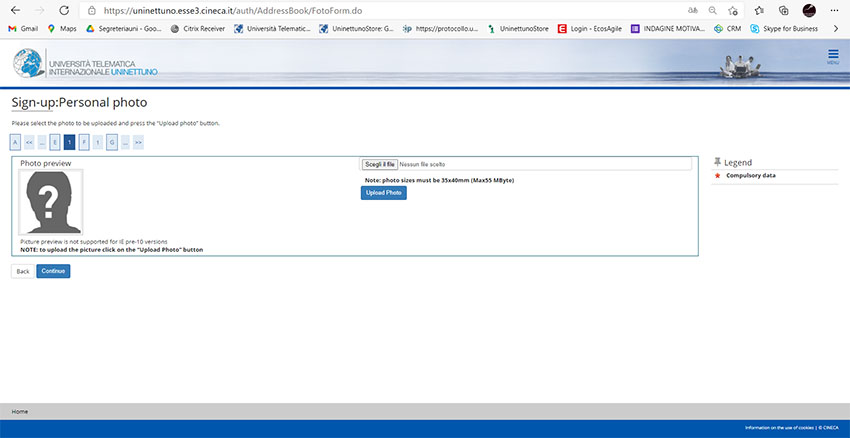
Step 2.6 - Other Pages
This screen and the next one are used to enter the declaration of disability - if any - and the photo; both can be skipped without filling them in by clicking on the "Next" button.
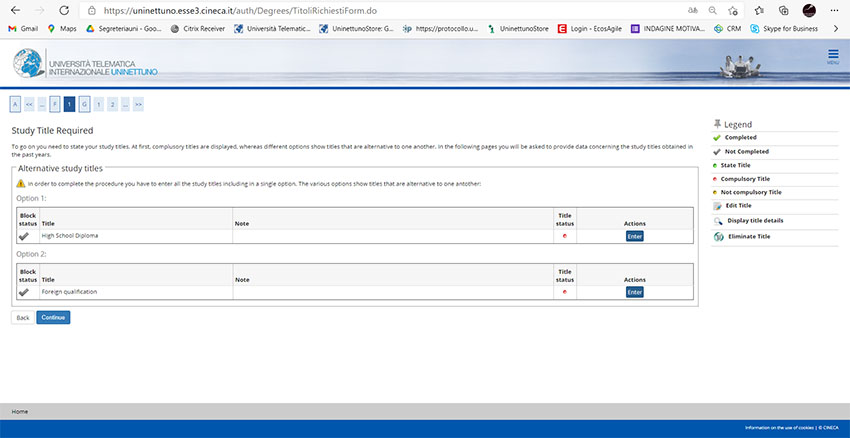
Step 2.7 - Access titles
In this screen, which is compulsory, you must insert the access titles to the course.
We recommend that you enter the most recent or most relevant degree. Once correctly filled in, a green dot will appear under "Title Status".
It is sufficient to upload only one qualification.
Important: enter a degree for which you have a scan of the certificate - or self-certification, because on subsequent screens you will be asked to upload.
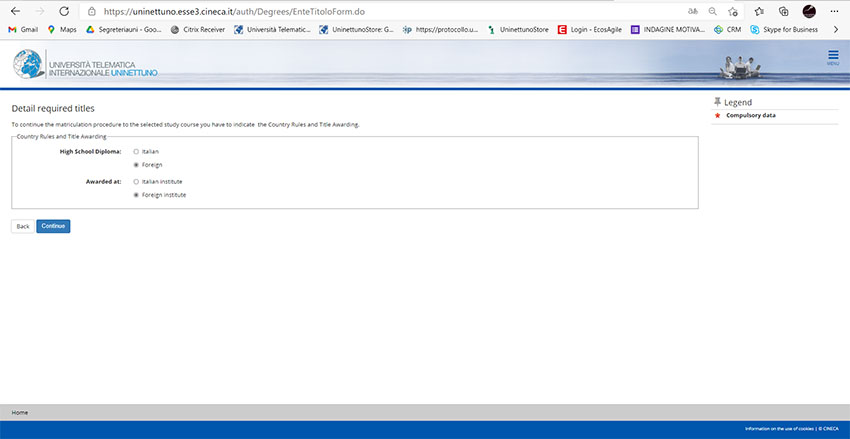
Step 2.8 - Title Detail
On these next screens, the student must fill in some mandatory details of the degree earned.
Pay attention to the year the degree was earned.
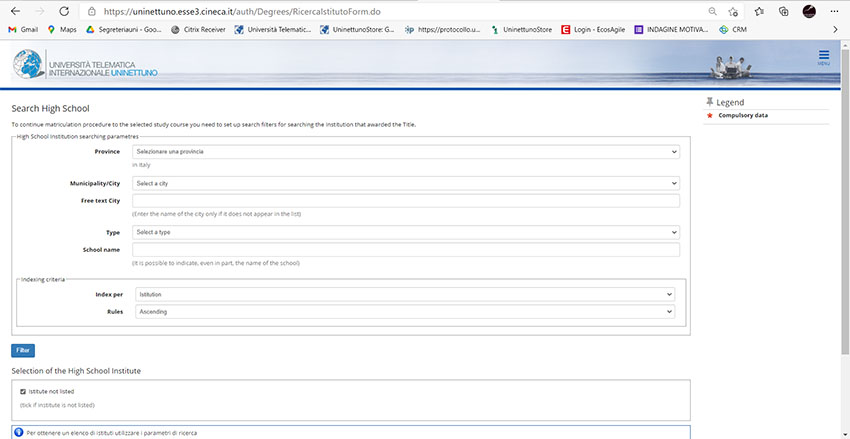
The search for the institute where the diploma or degree was obtained must be done through the drop-down menu: we advise the student to fill in only the fields referring to "Province" and "City/County" and then click on "Search Institute". A table with all the reference institutes will appear below.
In case the Institute is not in the list, it is possible to add the flag "The Institute is not in the list" and then click on "Proceed" at the bottom of the page to go and enter the details.
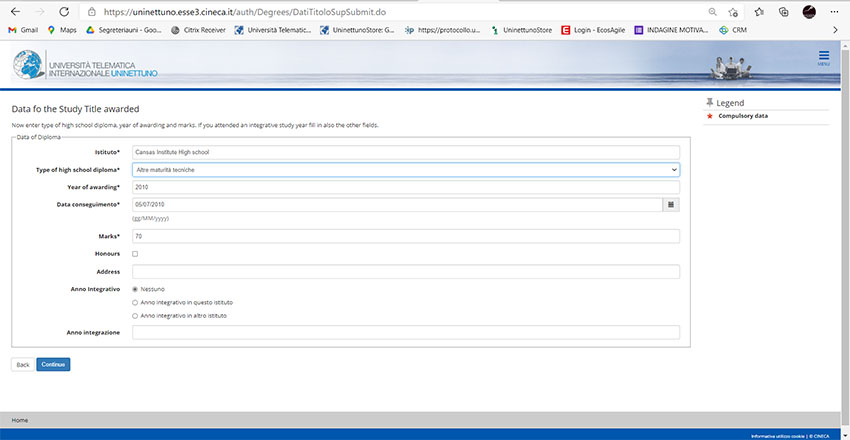
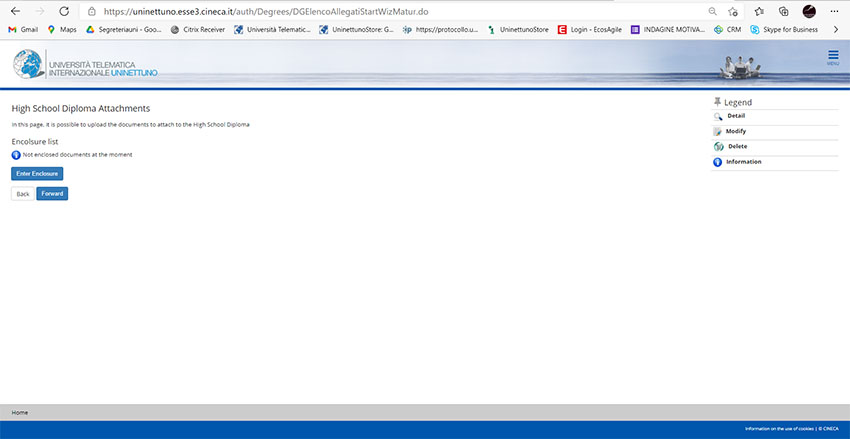
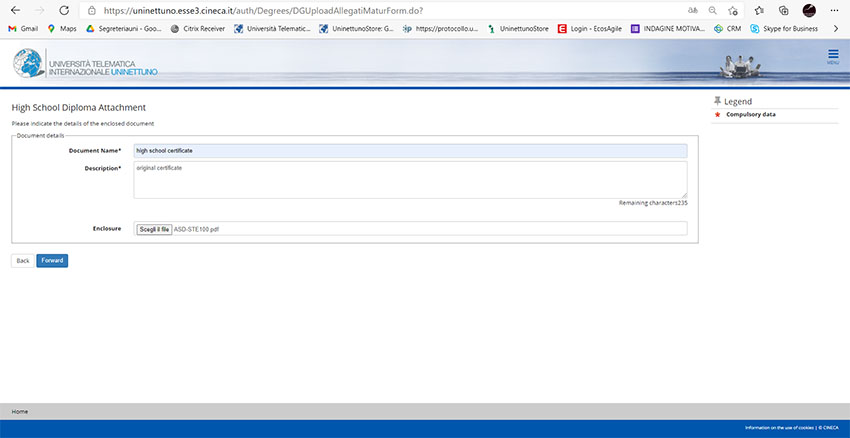
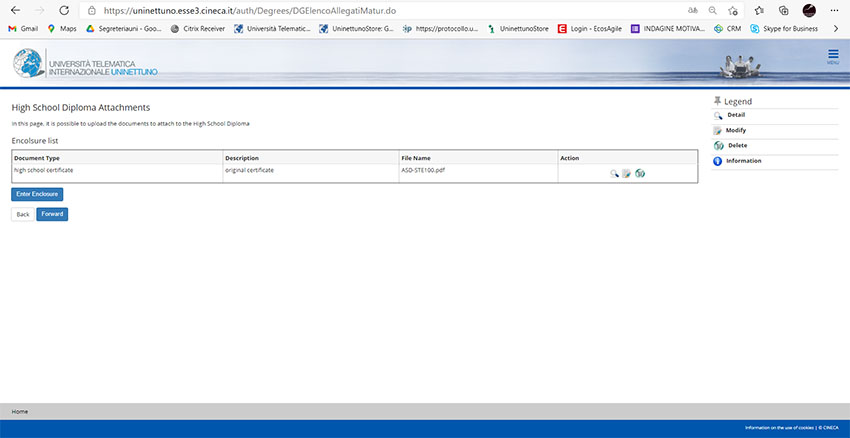
In these next two screens, which are linked to the previous one, the student must attach a scan of the declared certificate.
This is a required field to move forward with enrolment.

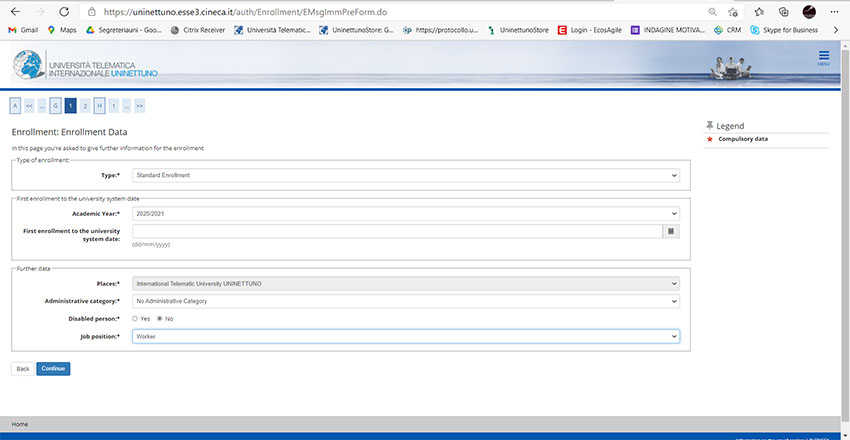
Step 2.9 - Data
In this screen the student will need to choose the administrative category from the drop down menu (in the case of no active agreement, select "not agreed") and enter the employment status to proceed.
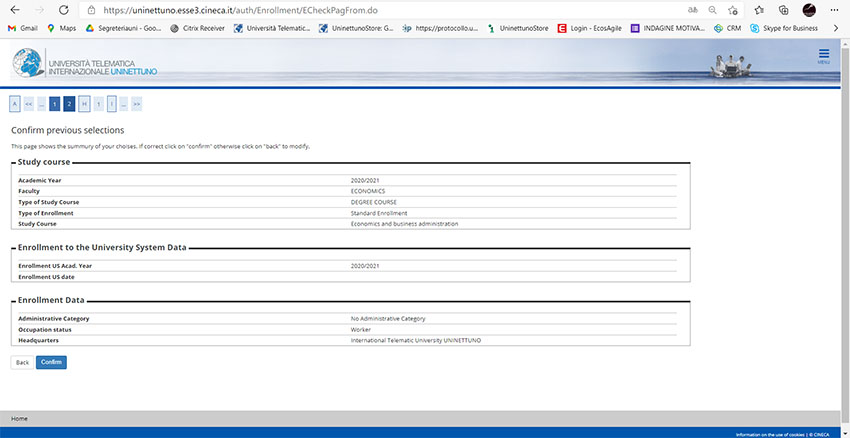
Step 2.10 - Summary
At the end of the process the summary screen will appear with the last information entered: course type, academic year, administrative category and employment status.
The student is prompted to check the information and click the "Confirm" button.
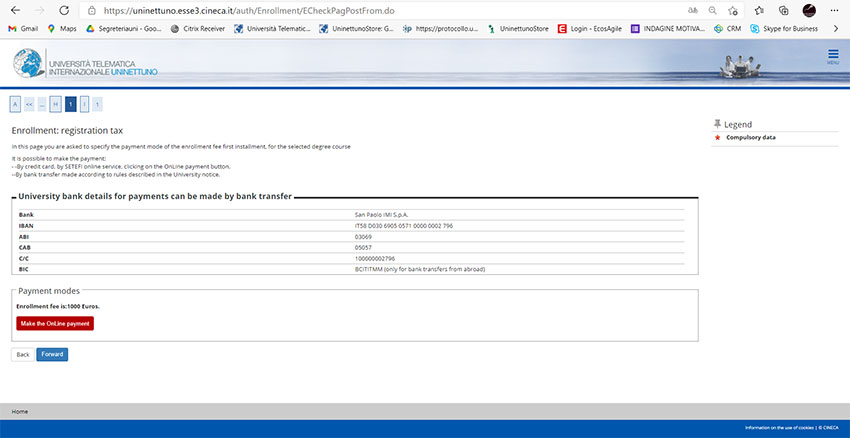
Step 2.11 - Bank Details
The last step is the summary of the University's bank details, the amount due and the payment method.
You must now click on "Next" to finalize the enrollment.
Step 3 - Enrolment Confirmation
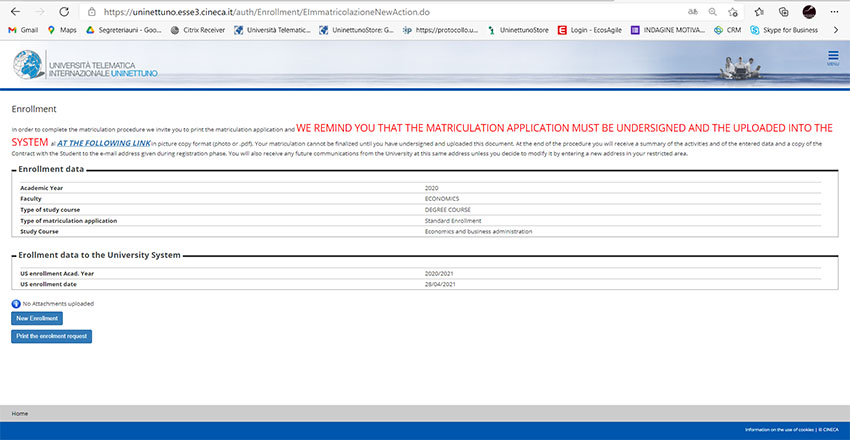
Here you can print the "Enrolment Application" which contains all the data entered. The student can now log out.
The application must be downloaded, printed, signed and uploaded to the system (the next screen shows how to upload it, once signed).
In this step the student has completed the Pre-Enrolment: the confirmation of the enrolment will take place after the payment of the amount due, after which it will be possible to access with the credentials to the UNINETTUNO portal (www.uninettunouniversity.net).
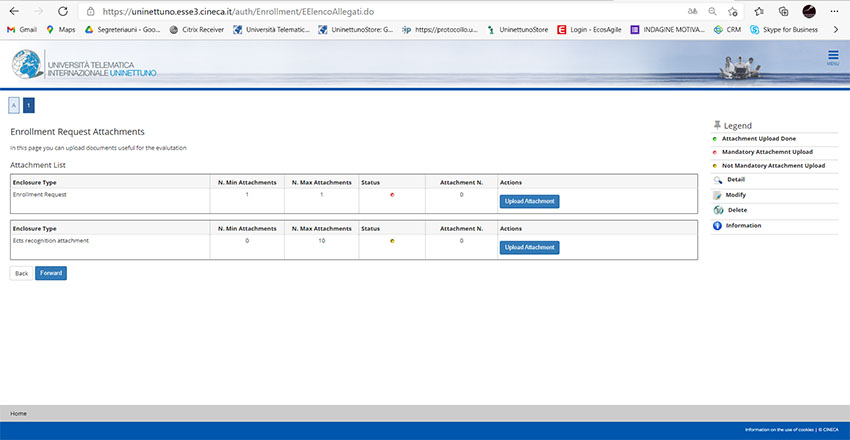
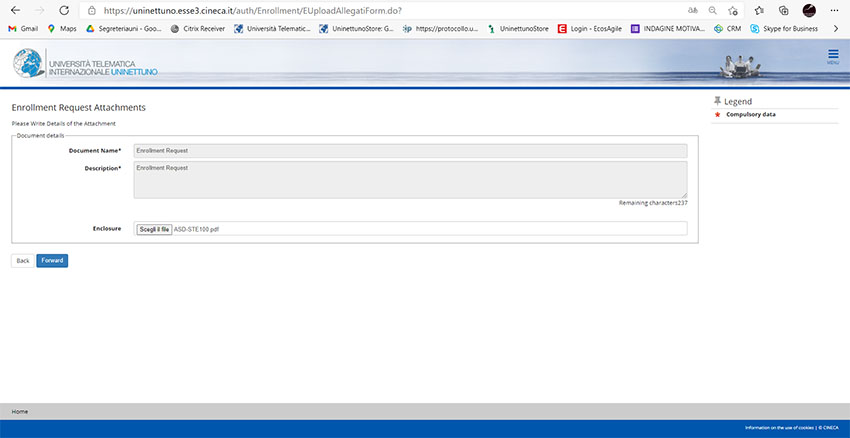
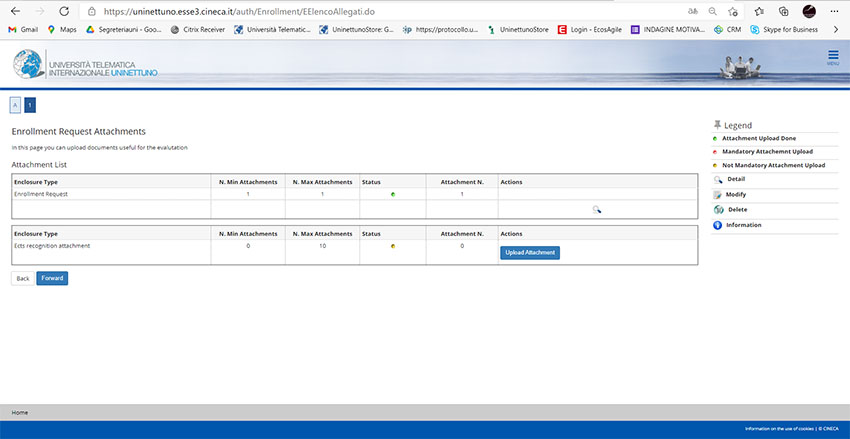
Step 3.1 - Attaching the Enrolment Application and ECTS Credits Recognition, if any
Login to the Administrative Secretariat (https://uninettuno.esse3.cineca.it/Start.do?cod_lingua=eng) to upload the matriculation application.
The following screens show how to upload the last documents needed to finalize the enrolment procedure
If you have any technical problem with the matriculation procedure, you can get in touch with the Student Secretariat by: